
Image Optimization
Table of Contents
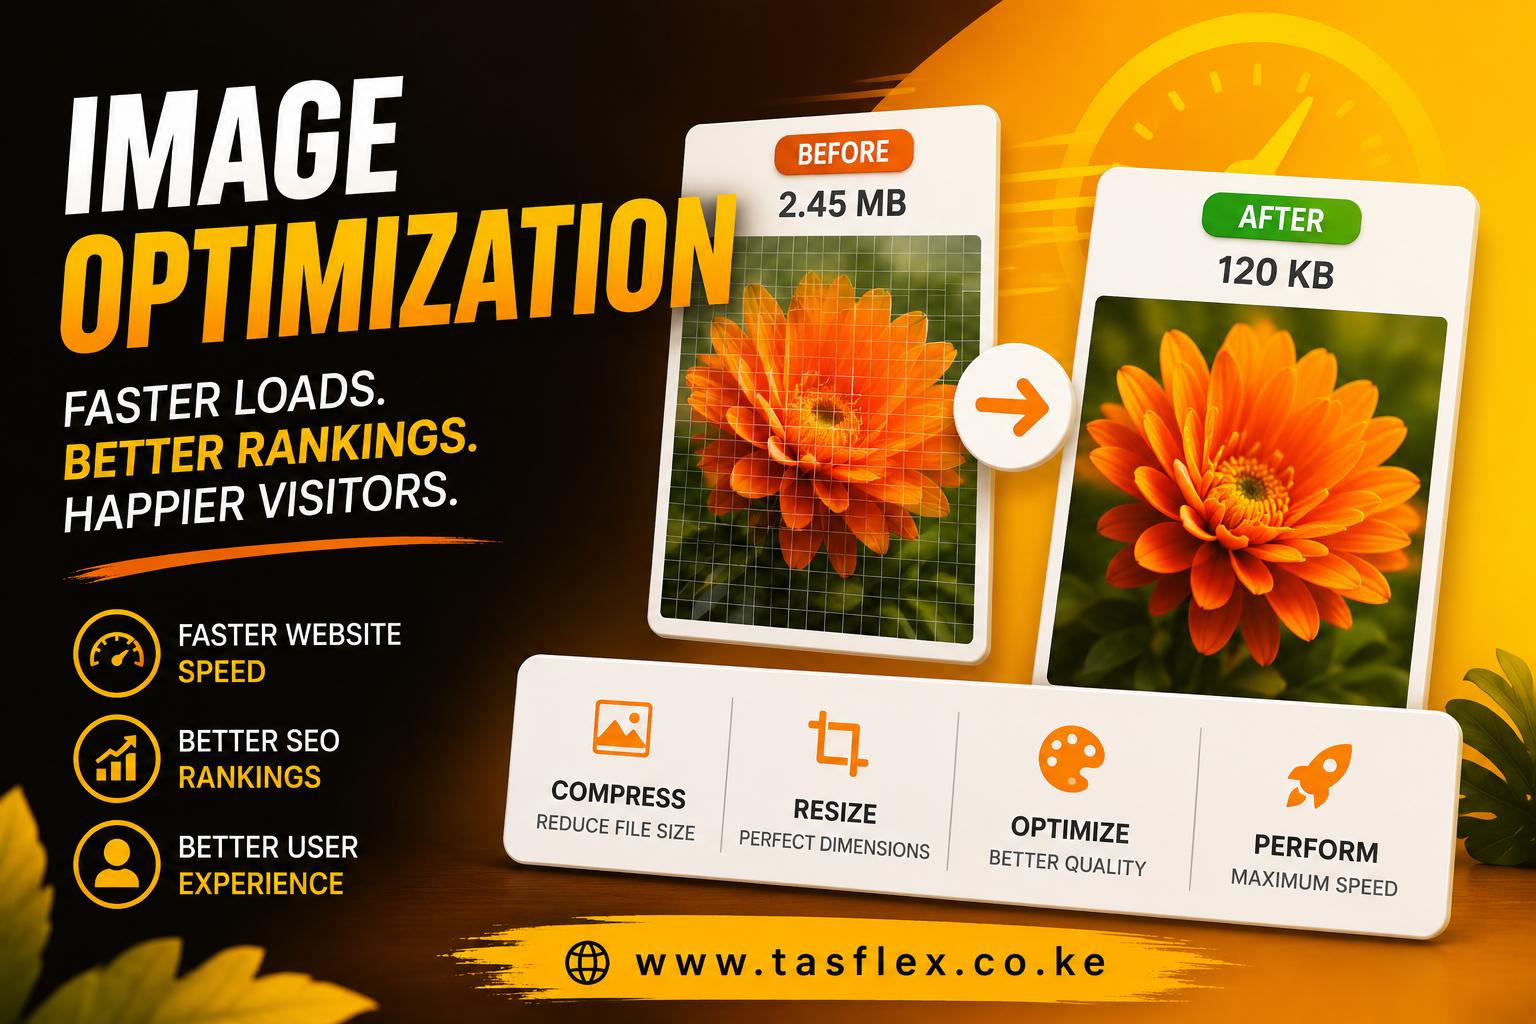
You spend days capturing high-resolution product photography, sourcing premium graphics, or designing stunning banner visuals for your web platform. But when you upload those assets and test your pages, you notice a painful reality: your website crawls at a snail’s pace, and visitors are clicking away before your images even finish rendering.
High-quality visuals are essential for capturing attention and building user trust. However, raw, unmanaged files are the silent killer of digital platforms. If you aren’t actively management-scaling your assets, you are committing one of the most critical website mistakes that kill your traffic.
True web mastery lies in a single execution goal: displaying breathtaking, crisp imagery that consumes almost zero loading time. Let’s unpack the hidden industry secrets of how to optimize images for web without losing quality, allowing you to protect your visual design while maintaining blazing-fast performance.
Why Massive Images Slow Down Websites and Destroy Conversions

Every asset uploaded to your web host has a virtual weight measured in kilobytes (KB) or megabytes (MB). When a customer clicks your link, their browser has to manually download every single byte of that weight before the site can render cleanly.
If your homepage features several raw 4MB camera files, mobile users on slower cellular networks will experience massive lag. Search engines track this loading friction using a user experience metric called Largest Contentful Paint (LCP), which measures how quickly the primary visual element on a screen finishes loading. If your LCP score is poor due to bloated files, search engines will downgrade your organic visibility.
Failing to compress your visuals is an incredibly widespread issue, frequently ranking among the top common website mistakes small businesses make. To prevent your media library from destroying your business growth, you must apply strategic compression mechanics.
Secret 1: Choose the Best Image Format for Website Speed
The first step in reducing your site’s asset weight is choosing the correct file container. The ideal format depends entirely on the type of graphic you are displaying:
- AVIF (The Performance Leader): This cutting-edge format delivers the most advanced web compression available today. AVIF files are roughly 50% smaller than standard JPEGs and 20–30% smaller than WebP files at identical visual quality. Use AVIF for your high-traffic hero images and complex product photography.
- WebP (The Universal Workhorse): WebP provides incredibly clean compression, transparency support, and crisp edges. Because it enjoys near-universal browser support and compresses extremely fast on server backends, WebP is the perfect baseline default format for daily content publishing.
- SVG (The Only Choice for Vector Graphics): SVGs aren’t made of pixels; they are built from mathematical code. This makes them infinitely scalable without losing a single ounce of clarity. Always use SVG for logos, social icons, and flat illustrations.
- JPEG & PNG (The Fallbacks): Use PNG strictly when you require lossless, pixel-perfect editing transparency that next-gen formats cannot replicate. Keep JPEGs reserved as traditional backup layers for older, legacy systems or marketing email clients.
Secret 2: Resize and Compress Assets Correctly
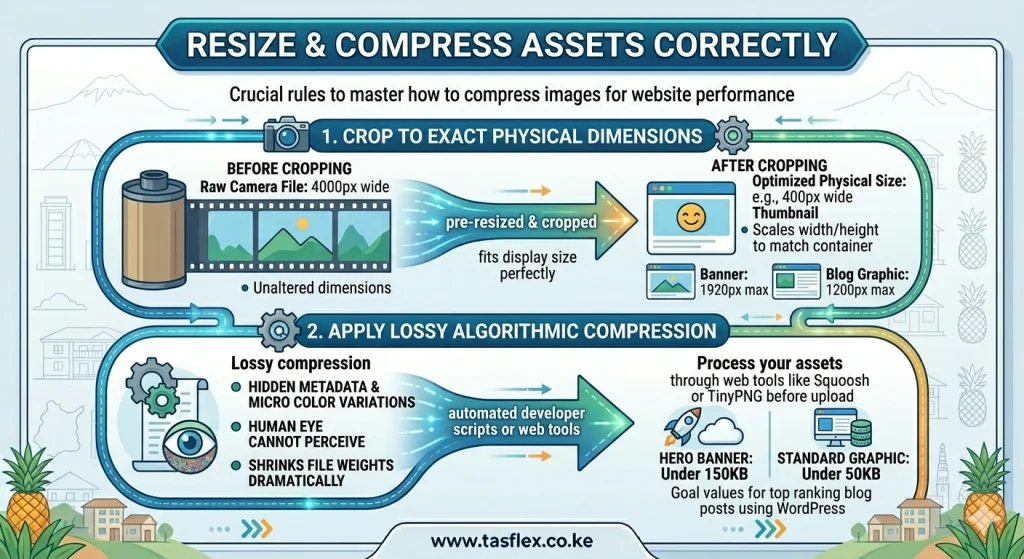
A massive technical mistake is relying on your web layout code to shrink a giant file into a small display box. If you upload a 4000-pixel-wide camera image but display it in a 400-pixel-wide thumbnail container, the user’s browser is still forced to download the entire 4000-pixel file weight.
[Raw Camera File: 4000px] ---> uploaded directly ---> [Squeezed by browser layout into 400px box]
                                                        (Wastes 90% of user bandwidth!)

[Optimized File: 400px]   ---> pre-resized        ---> [Fits 400px container perfectly]
                                                        (Loads instantly, saves bytes!)
To master how to compress images for website performance, follow these production rules:
1. Crop to Exact Physical Dimensions
Before running any compression software, scale the image’s physical width and height to match the maximum width it will ever occupy on a desktop screen. Banners rarely need to exceed 1920 pixels wide, while standard blog content graphics function perfectly at 1200 pixels wide.
2. Apply Lossy Algorithmic Compression
Lossy compression strips out hidden metadata and microscopic color variations that the human eye cannot physically perceive, shrinking file weights dramatically. Process your assets through web tools like Squoosh, TinyPNG, or automated developer scripts before hitting the upload button. Aim to keep hero banners under 150KB and standard body graphics under 50KB.
Secret 3: Advanced Image Optimization Tips for SEO
Once your files are lightweight and correctly formatted, you must configure their metadata to support your broader search visibility goals.
- Write Descriptive, Keyword-Rich File Names: Search engine bots cannot see your pictures visually; they read your code. Stop uploading files labeled
IMG_8293.jpg. Change the filename to descriptive, hyphenated structures likecustom-web-design-services-nairobi.webp. - Utilize Strategic Alternative Text (Alt Text): Alt text displays if an asset fails to load and allows accessibility screen-readers to describe the graphic to visually impaired users. Write natural, helpful alt descriptions that describe the visual accurately while naturally weaving in your core target search phrases.
- Activate Native Lazy Loading: Adding the
loading="lazy"attribute to your image tags tells the browser to pause downloading below-the-fold media until the user actually scrolls down to that specific section of the page. This keeps your initial page load light and instantaneous.
Format & Performance Blueprint
To select the absolute best image format for website speed and keep your layout sharp, use this practical production reference guide:
| Graphic Type | Preferred Web Format | Compression Power | Key Design Benefit |
| Brand Logos & Interface Icons | SVG | Infinitely Light | Scales perfectly to any resolution without pixelation. |
| Complex Editorial Photography | AVIF | Maximum (~50% smaller than JPEG) | Maintains incredible color depth and smooth gradients at tiny weights. |
| Standard Service & Blog Graphics | WebP | High (~30% smaller than JPEG) | Universal modern browser support with lightning-fast load times. |
| Transparent Design Overlays | WebP / PNG | Variable | WebP preserves transparent backgrounds at a fraction of PNG’s weight. |
Frequently Asked Questions About Image Optimization
Will compressing my images make them look blurry or pixelated?
Not if you use modern web compression settings. Tools utilizing lossy WebP or AVIF algorithms remove data that is naturally invisible to the human eye. Dropping quality levels to 75% or 80% will reduce your file sizes by up to 80% while keeping the images looking crisp and beautiful on standard screens.
How do I deliver optimized images to both mobile and desktop users?
You should implement responsive images using HTML srcset properties or <picture> elements. This allows your web architecture to detect the visitor’s screen size automatically and serve a smaller, lighter file to mobile phones while reserving the full-sized asset for large desktop monitors.
Should I use an automated optimization plugin on my web platform?
Automated optimization systems are excellent for handling user uploads in real-time, but they can put a heavy processing load on your server backend. For your high-traffic landing pages and core marketing funnels, it is always best to manually resize, format, and compress your visuals before uploading them to your media library.
Leverage Blazing-Fast Performance with Tasflex
Balancing beautiful, high-resolution visual storytelling with meticulous image sizing, format selection, alt-tag mapping, and script configurations requires deep technical precision. You shouldn’t have to sacrifice your brand’s artistic aesthetics or spend hours manually adjusting compression levels just to keep your page speeds high.
We build digital platforms engineered to perform. At Tasflex, we specialize in building highly secure, beautifully formatted, and unbelievably fast business websites. As highlighted in Search Discovery & Website Health (Technical SEO) within our service delivery framework, we strip away hidden performance bottlenecks. We optimize your entire media library, leverage next-gen formats, and implement advanced caching structures to guarantee your pages load instantly on every device.
Let’s make your brand look flawless without compromising on speed. Explore our premium Tasflex custom web development, automated content SEO, and speed optimization packages today, and let’s engineer a platform built to convert!